


How-to: Replace the V2+ Hydrant Vacuum Breaker Assembly
How do I know if my vacuum breaker is faulty or leaking?
If the vacuum breaker is defective, it will leak while the hose connector is plugged in.
When working properly, you shouldn’t notice the vacuum breaker. It is okay for the vacuum breaker to purge or drain a few seconds longer than the main outlet. If there is a problem, it will leak continually when connected.
Once you’ve confirmed that the leak is coming from the vacuum breaker, it’s time to inspect and replace the assembly if needed.
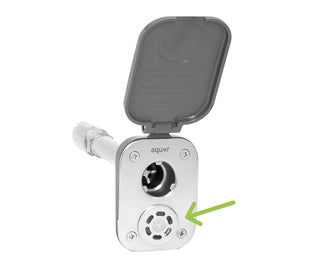
1) First, unscrew the vacuum breaker cover.
It’s the round piece below the main outlet.

![]() Use a pair of needle-nose pliers to gently remove the cover.
Use a pair of needle-nose pliers to gently remove the cover.
Note: Be gentle when unscrewing the vacuum-breaker cover. If you have trouble removing it, we have a custom removal tool available for purchase.
2) You should see the vacuum breaker through the drain port.
If you don’t see a black washer facing you, chances are the vacuum breaker has been installed incorrectly or is missing. 
3) Unscrew the vacuum breaker retainer. It's the round white part.
Gently unscrew the retainer with an allen wrench or needle-nose pliers.
If you are a plumber or are working on a high-value project, we also have a custom removal tool specific for the V2+ vacuum-breaker available. Please contact us for more info.
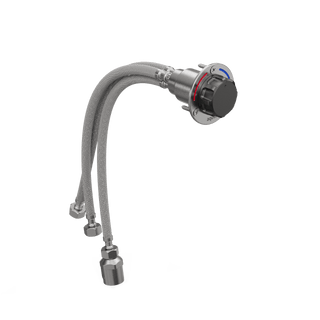
4) Inspect the vacuum breaker assembly.
The original V2+ model contains a washer that sits behind the vacuum breaker, while the latest model includes a green O-ring—both provide leak protection.
Note the position and orientation of each part according to the diagram below.  If any parts are missing, contact us for replacements.
If all parts are present and appear to be in good working condition, but the problem persists, please contact us for support.
5) Re-assemble.
Note: Do NOT over-tighten the retainer or cover. 
 Fill out a warranty claim here.