How to Build a Pond Overview
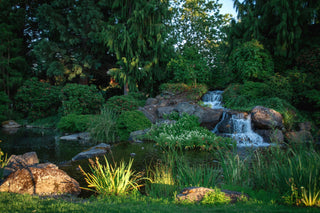
Building a pond can add tranquility and more visual interest to your outdoor space. Here’s a brief overview with installation steps to help you decide if you’re up for this DIY project or if you’d rather hire a professional.
Materials Needed
- Shovel, level, and other basic garden tools
- Underlayment material
- Pond liner
- Pond pump
- Filter (if you have fish)
- Stones and rocks of varying sizes
- Foam sealant
- Plants
- Aquatic life (optional)

Step-by-Step Guide
- Choose a Location:
- Choose a location with easy access to electricity (for the pump) and running water.
- Select a spot with partial sunlight (about 4-6 hours of sunlight per day).
- Avoid areas with overhanging trees and large bushes to minimize debris.
- Ensure the location is accessible for maintenance.
- Plan and Design:
- Choose the size and shape of your pond. Use a rope or twine to outline the shape.
- Consider the depth. Typically, ponds should be at least 18-24 inches deep to support fish and plants.
- Excavate the Pond:
- Start digging within the outlined area. Create shelves or ledges for plants at varying depths.
- Make sure the bottom is level and free of sharp rocks or roots.
- Add Underlayment:
- Arrange underlayment material to protect the pond liner from punctures.
- Install the Pond Liner:
- Place the liner over the hole, ensuring it fits well and overlaps the edges.You can choose either a flexible or preformed liner. Reinforced Polyethylene Pond Liners are recommended for their durability.
- Smooth out wrinkles and secure the edges with rocks or heavy objects, like logs.
- Install Pump and Filter:
- Position the pump at the deepest section, away from where the water will be entering the pond. Connect the pump to the filter and any additional features like waterfalls or fountains.
- Confirm the power source is safe and protected from water.
- Arrange Stones & Rocks:
- Rinse off the stones and rocks you'll be using to help with water clarity.
- Place the larger rocks on the bottom and sides of the pond, hiding the pump and filter.
- Fill in the gaps with smaller stones, covering up as much of the liner as possible.
- Add Edging and Decorations:
- Place stones, rocks, or other edging materials around the pond's perimeter to hide the liner and create a natural look.
- Add any additional features like lighting or decorative elements.
- Use foam sealant around the perimeter rocks and waterfalls to prevent leaks.
- Fill the Pond:
- Begin filling the pond with water.
- Adjust the liner edges as needed and trim excess liner, leaving enough to secure with edging material.
- Planting and Stocking:
- Add aquatic plants to the shelves and deeper areas. Plants like water lilies and cattails help maintain water quality.
- Introduce fish and other aquatic life gradually to allow the ecosystem to balance.
- Maintenance:
- Regularly check the pump and filter to ensure they are functioning correctly.
- Remove debris and fallen leaves to keep the water clear.
- Monitor water levels and top off as needed, especially during hot weather.

Additional Tips
- Safety: Ensure the pond has a gradual slope or shallow areas if children or pets will be nearby.
- Algae Control: Use pond treatments or UV clarifiers to manage algae growth.
- Winterizing: In colder climates, consider a pond heater or de-icer to protect fish during winter.

Video How-to
Time to create your own backyard oasis! Watch this DIY video to learn more details, so you can build your own pond too. You can always start off with something simple—not all ponds require epic waterfalls and an abundance of fish.

